How to Use Alight Motion with CapCut for Easy Editing?
Have you ever wondered how to get the super-smooth animations from Alight Motion into your easy-to-edit CapCut projects? You’re not alone! Many creators want to combine the best of both worlds: Alight Motion’s professional animation power and CapCut’s fast, user-friendly editing.
While you can’t “add” one app into the other, there’s a very simple workflow that lets you use them together. This friendly guide from Alight Motion Media will show you exactly how to create amazing animations in Alight Motion and then seamlessly add them to your videos in CapCut.
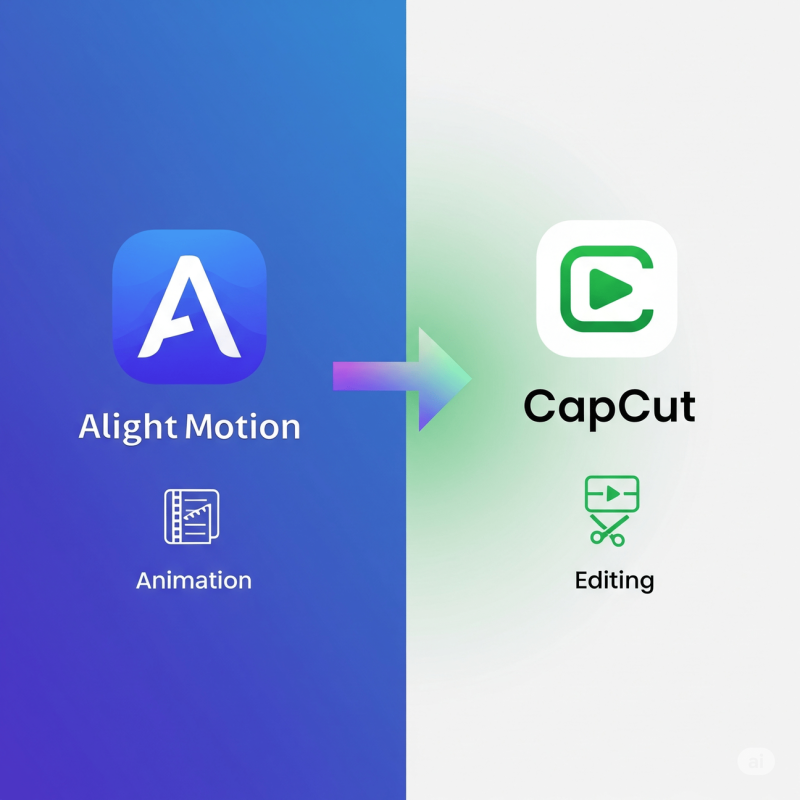
Why Use Both Apps Together? The Perfect Combo
So, why go through the trouble of using two apps? It’s all about playing to their strengths.
- Alight Motion is for… Professional Animation. It has powerful tools like keyframing and a graph editor to create complex, custom animations that CapCut just can’t do.
- CapCut is for… Fast and Easy Editing. It’s amazing for quickly cutting clips together, adding trending sounds, using templates, and generating automatic captions.
By using them together, you get the pro-level animations of Alight Motion with the speed and simplicity of CapCut.
The 3-Step Workflow: Alight Motion to CapCut
Here’s the simple process to bring your Alight Motion creations into CapCut.
Step 1: Create Your Animation in Alight Motion
First, you’ll create your animation—like a cool text effect, a custom graphic, or a character animation—in Alight Motion. The most important part of this step is how you export it.
- Create your animation on a transparent or green screen background. A green background is often easiest.
- Once you’re finished, tap the export icon in the top-right corner.
- Choose “Video” as the format.
- Make sure your export settings are high quality (e.g., 1080p).
- Tap “Export” and save the video to your phone’s gallery.
You now have a video file of just your animation.
Step 2: Open CapCut and Import Your Main Video
Now, switch over to CapCut.
- Open CapCut and start a new project.
- Add the main video clip that you want to be the background for your animation.
Step 3: Add Your Alight Motion Animation as an Overlay
This is where you combine them.
- In your CapCut project, tap the “Overlay” button in the bottom toolbar.
- Tap “Add overlay” and select the animation video you just exported from Alight Motion.
- Your animation will now appear as a new layer on top of your main video.
- If you used a green screen, select the overlay layer, find the “Cutout” tool in the bottom menu, choose “Chroma key,” select the green color, and adjust the intensity to make the background disappear.
That’s it! You can now resize and position your Alight Motion animation anywhere you want in your CapCut project.
Pro Tips for a Smooth Workflow
- Use High Frame Rates: For the smoothest animations, try creating and exporting your Alight Motion project at 60 fps (frames per second).
- Keep it Short: It’s best to use this workflow for shorter animated elements (like intros, lower thirds, or special effects) rather than trying to create your entire video in Alight Motion.
- Organize Your Files: Create a special album in your phone’s gallery for your “Alight Motion Exports” so you can find them easily when you’re in CapCut.
Download Alight Motion Mod APK Pro (%global_latest%) for Android now! and for older and stabled version click here.. If you want this application for PC or iOS click on the links.