How to Replace Images in Alight Motion Templates 2025?
So, you’ve downloaded an awesome Alight Motion template or preset, but now you’re staring at someone else’s photos and wondering, “How do I put my own pictures in here?” Don’t worry, you’re in the right place!
Replacing images and videos in Alight Motion Pro is one of the most common things new users need to learn, and it’s actually super simple once you know the right button to press. This friendly guide from Alight Motion Media will walk you through the easiest way to swap out media, making it feel natural and easy.
The Easiest Way: Using the “Color & Fill” Method
Forget complicated methods. The fastest and most reliable way to replace an image or video in a template is by using the “Color & Fill” menu. It sounds a bit strange, but trust me, this is the magic button you’re looking for.
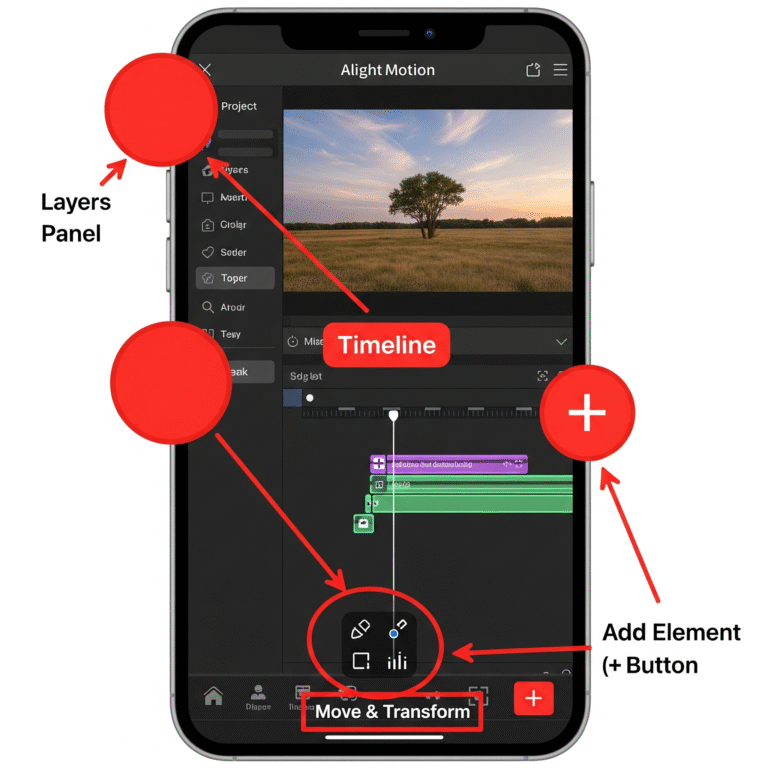
Step 1: Open Your Project and Find the Image Layer
First, open the Alight Motion project you downloaded. You’ll see a timeline at the bottom with multiple layers. Scroll through the layers and tap on the one that contains the image you want to replace.
Step 2: Go to “Color & Fill”
With the image layer selected, look at the bottom of your screen. You’ll see a few options. Tap on the one that says “Color & Fill”.
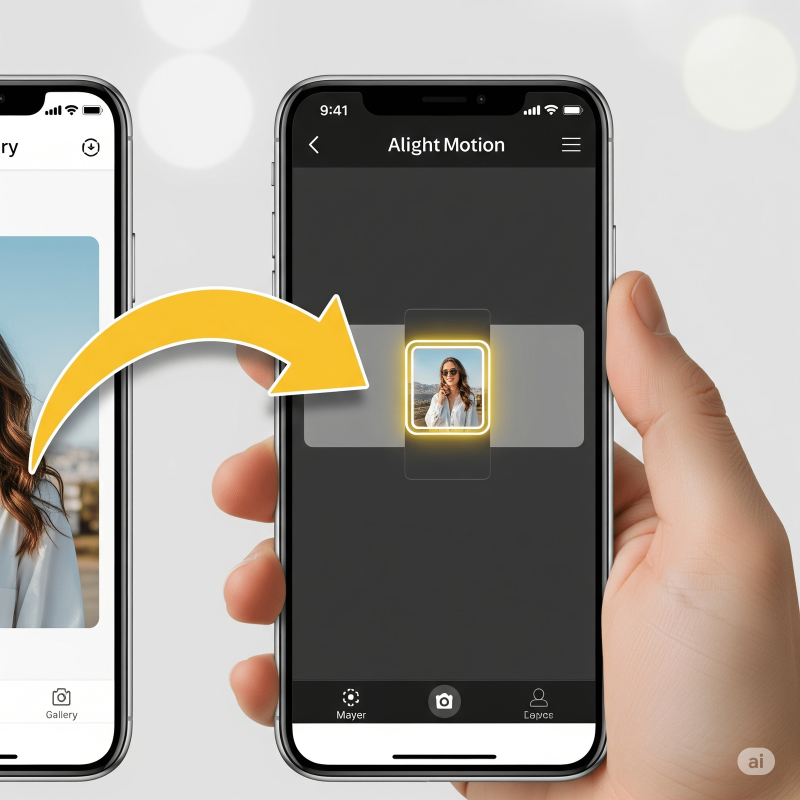
Step 3: Select Your New Image
This is the most important step! Inside the “Color & Fill” menu, you’ll see a large button that shows the current image. Tap on this button.
This will open up your phone’s gallery. Now, just find and select the new image or video you want to use.
And that’s it! Alight Motion will instantly replace the old image with your new one, while keeping all the cool effects and animations from the template perfectly intact.
Pro Tips for a Perfect Replacement
Following the steps above works perfectly most of the time, but here are a couple of extra tips to make sure your edit looks flawless.
- Match the Duration: Sometimes, your new video clip might be shorter than the original placeholder. To fix this, tap on the layer, go to the end of it on the timeline, and use the “Speed” (timer) icon to stretch it out to match the original length.
- Replacing Videos Works Too! This exact same method works for replacing videos, not just images. Follow the same steps to swap out any video clip in a template.
Troubleshooting Common Issues
“My new image is stretched or zoomed in!” This happens if your new image has a different aspect ratio than the original one. To fix it, select the layer, tap “Move & Transform,” and use the “Scale” tool (the third icon) to pinch and zoom until it fits perfectly.
“I can’t find the ‘Color & Fill’ button.” Make sure you have selected the correct layer on the timeline. The “Color & Fill” option will only appear when you’ve tapped on a layer that contains an image, shape, or video.
Download Alight Motion Mod APK Pro (%global_latest%) for Android now! and for older and stabled version click here.. If you want this application for PC or iOS click on the links.