Alight Motion Editing Academy: Free Tutorials & Guides (2025)
Updated on January 26, 2026
Welcome to the Alight Motion Editing Academy.
If you have ever watched a viral TikTok edit or a stunning Anime Music Video (AMV) and wondered, “How did they do that on a phone?”, you are in the right place. Alight Motion is widely recognized as the “After Effects of Mobile.” It offers professional-grade tools like vector graphics, visual effects, and complex keyframe animation that simply don’t exist in other apps like CapCut or InShot.
However, with great power comes a steep learning curve. Opening Alight Motion for the first time can feel like staring into the cockpit of a fighter jet. There are graphs, nodes, layers, and settings everywhere.
That is why we created this hub of Alight Motion Tutorials. Whether you are a complete beginner trying to trim a clip or an advanced editor looking to master the Wave Text Animation trend of 2025, this guide is your roadmap. We have broken down the learning process into simple, actionable modules to take you from “Novice” to “Pro” in record time.
From Beginner to Pro: Why Master Alight Motion?
Most mobile editors are “template-based.” You drag a photo in, and the app does the rest. Alight Motion is different. It is a “compositor.”
The “Mobile After Effects” Philosophy
To master Alight Motion, you need to stop thinking about “filters” and start thinking about “layers.”
- Total Control: You don’t just apply a “shake.” You control the frequency, magnitude, and evolution of that shake using math.
- Vector Power: You can draw custom shapes and animate them without losing quality, perfect for motion graphics and logos.
- Professional Output: When mastered, Alight Motion projects look indistinguishable from PC software edits.
Module 1: The Basics (Getting Started)
Before you can run, you must walk. Let’s decode the workspace.
Understanding the Interface (Timeline & Layers)
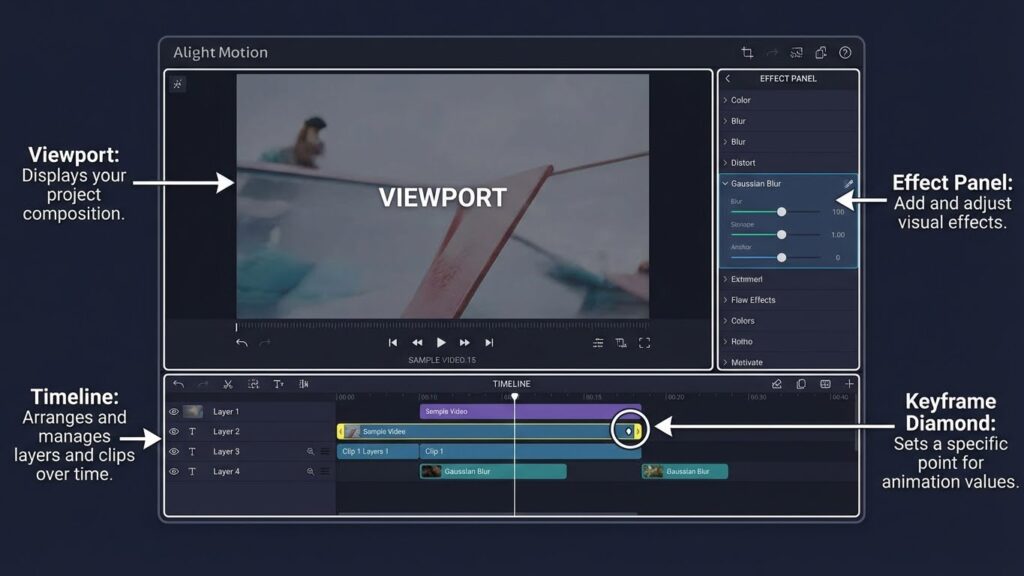
When you open a new project, you see the Viewport (the screen), the Timeline (the bottom tracks), and the Element Panel (the (+) button).
- The Timeline: This is where time exists. The left is the start; the right is the end. You stack media vertically. The top layer covers the bottom layer.
- The Playhead: The white vertical line that shows exactly which frame you are looking at.
Importing Media & Aspect Ratios (9:16 vs 16:9)
Choosing the right canvas is step one.
- 9:16 (Vertical): Essential for TikTok, Reels, and Shorts.
- 16:9 (Landscape): The standard for YouTube videos.
- 1:1 (Square): Often used for Instagram feed posts or logo animations.
- Tip: Always import media at the highest quality, but preview it in “Low Quality” mode to prevent lag. (See our [Troubleshooting Hub] for more on this).
Module 2: Core Mechanics (The “Secret Sauce”)
This module covers the concepts that scare beginners away but are actually the most powerful tools in the app.
What are Keyframes? (Animation 101)
If there is one thing you take away from these Alight Motion Tutorials, let it be this: Keyframes are King. A keyframe is simply a marker that tells the app: “At this specific second, be at this specific value”.
- Example: You put a keyframe at 00:00 saying “Opacity 0%.” You put another at 00:02 saying “Opacity 100%.” The app automatically calculates the fade-in between those two points. You can keyframe almost anything: Position, Scale, Color, Rotation, and even Effect Intensity.
Mastering Graphs: Linear vs. Bezier Curves
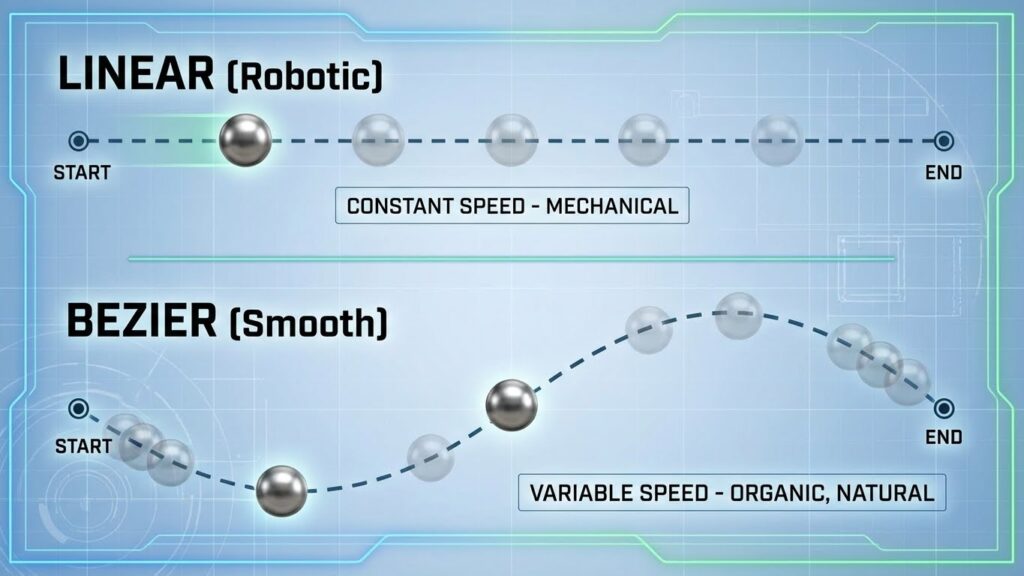
Keyframes tell the app where to go. Graphs tell the app how fast to get there.
- Linear (Straight Line): The movement is robotic and constant. Boring.
- The S-Curve: The “Holy Grail” of smooth editing. It starts slow, moves fast in the middle, and slows down at the end. This makes movements feel natural and organic.
Read More: Dive deep into curves in our dedicated [Beginner’s Guide: Keyframes & Graphs].
Module 3: Visual Effects & Compositing
This is where you become a wizard. Compositing is the art of combining multiple visual elements into a single image.
Green Screen & Chroma Key Basics
Want to put yourself on the moon? You need Chroma Key.
- Select Effect: Go to Effects > Add Effect > Chroma Key.
- Pick Color: Use the eyedropper to select the green background.
- Threshold: Adjust this slider until the green disappears but your subject remains solid.
Read More: Master this technique with our full [Green Screen / Chroma Key Guide].
Masking & Group Layers (The “Cookie Cutter” Trick)
Masking allows you to hide parts of a layer using a shape.
- How to do it: Place a Shape (like a Circle) above your Video layer. Select both layers. Tap the “Mask Group” icon (top toolbar, usually the middle button).
- Result: Your video now only plays inside the circle. This is crucial for text intros and creative transitions.
Module 4: Trending Styles of 2025
You know the tools. Now, let’s apply them to the trends dominating social media in 2025.
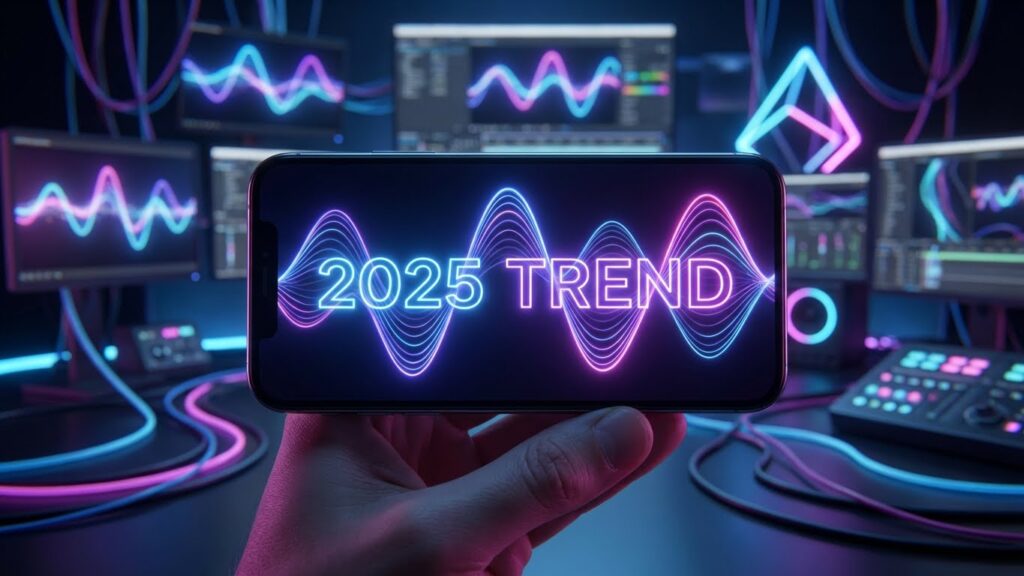
Wave Text Animation (Viral Intro Trend)
This aesthetic text effect is taking over Instagram Reels in 2025.
- The Concept: Each letter of your text moves in a fluid “wave” motion, creating a cinematic flow.
- How to do it: Use the “Text Transform” effect. Set the Phase property to animate with keyframes, and adjust the Component spacing so letters move sequentially rather than all at once.
Track Edit Bounce Effect
Perfect for TikTok edits, this effect makes the camera “bounce” to the beat of the music.
- The Concept: A sharp zoom-in followed by a soft recoil, synced exactly to a kick drum.
- How to do it: Use the “Oscillate” effect on a Null Object. Set the frequency to match the BPM (Beats Per Minute) of your track.
The Velocity Edit (Speed Ramping)
Velocity is the art of manipulating time, Slow, Fast, Slow.
- The Secret: It’s all about the “Speed Graph.” You don’t cut the clip; you use the Time Remapping tool to warp time.
Read More: Learn the exact steps in our [Velocity Edit Tutorial].
Module 5: Workflow Optimization
Professional editors don’t just work hard; they work smart. Here is how to speed up your process.
Using XML Presets to Save Time
Why build a “Shake Effect” from scratch every time?
- The Pro Move: Download a pre-made setting from our [Presets & XML Library].
- Implementation: Import the XML, copy the effect, and paste it onto your new clip. This saves hours of tweaking.
Organizing Layers & Grouping
A complex edit can have 50+ layers.
- Group Layers: Select all layers related to a specific scene and hit “Group.” This turns 10 layers into 1 manageable “Folder”.
- Labeling: Rename your layers (e.g., “Background,” “Subject,” “Text”). It sounds boring, but when you are searching for that one glitch effect later, you will thank yourself.
Common Beginner Mistakes to Avoid
Overusing Effects (The “Lag” Trap)
New users tend to slap 10 effects on every clip.
- The Result: The app becomes unresponsive, and exports crash.
- The Fix: Be subtle. Use “Null Objects” to apply one shake to multiple clips instead of putting a shake on every single clip. If your app crashes, read our [Fix Black Screen & Export Crashes] guide.
Ignoring Audio Sync (Beat Marking)
Visuals that don’t match the audio feel “off.”
- The Fix: Always mark your beats before you add video. Use the red bookmark tool in the timeline to tap out the rhythm of the song first. Download our [Beat Mark Presets] to skip this step.
Frequently Asked Questions (FAQ)
Conclusion: Start Your Learning Journey
The gap between you and your favorite Instagram editor isn’t “talent”, it’s knowledge. By following this Alight Motion Editing Academy curriculum, you are building the technical skills to express your creative vision without limits.
Start with Module 1 to get comfortable, then challenge yourself with a Velocity Edit in Module 4. And remember, if you get stuck on a technical error, our [Troubleshooting Hub] is always there to help.
Ready to learn? Pick your first lesson and let’s start editing.