Alight Motion Green Screen Guide: Chroma Key Tutorial (2025)
Updated on January 26, 2026
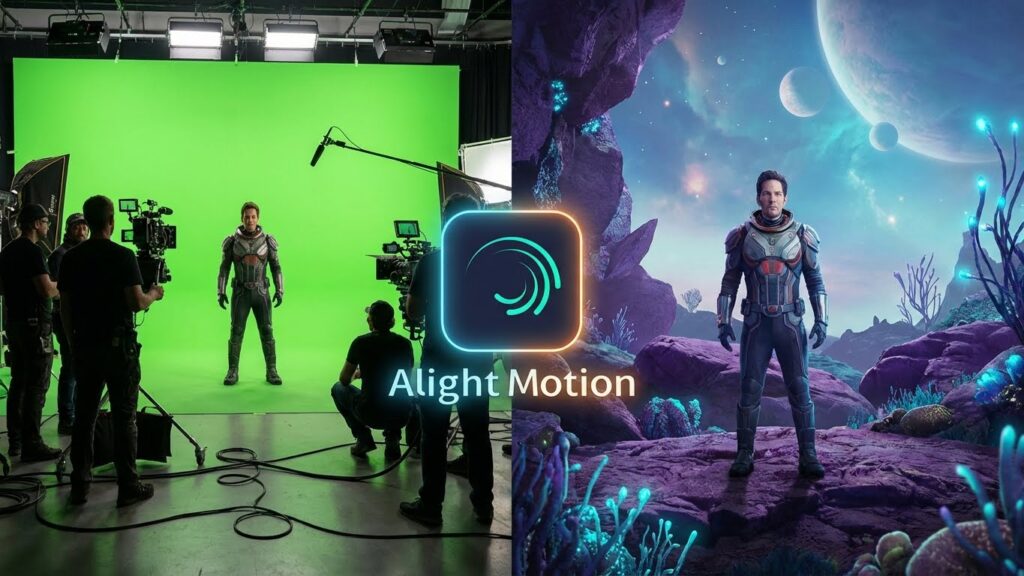
You want to transport your subject to space, put a dinosaur in your backyard, or simply add a “Subscribe” button animation to your video. The secret to all of these effects is the Green Screen.
In professional filmmaking, this is called Chroma Keying. For a long time, you needed powerful PC software like Adobe Premiere to do it cleanly. But today, Alight Motion brings Hollywood-level keying tools right to your smartphone.
In this guide, part of our [Alight Motion Editing Academy], we will teach you exactly how to use the Alight Motion Green Screen tools. We won’t just show you which button to press; we will show you how to refine the “Threshold” and “Feather” settings to ensure your edits look realistic and clean, with no ugly green outlines.
What is Chroma Key? (Understanding the Tech)
Chroma Key is a visual effects technique that removes a specific color from a video layer, making it transparent. This reveals the video layer underneath it.
Why Green? (The Color Science)
We usually use green because it is the color furthest away from human skin tones. If you tried to key out “Red,” you would accidentally make your actor’s lips and cheeks transparent!
- Note: You can technically key out any color (Blue, Magenta, etc.) using the same Alight Motion Chroma Key tools.
Step 1: Setting Up Your Layers
The most common mistake beginners make is putting the layers in the wrong order.
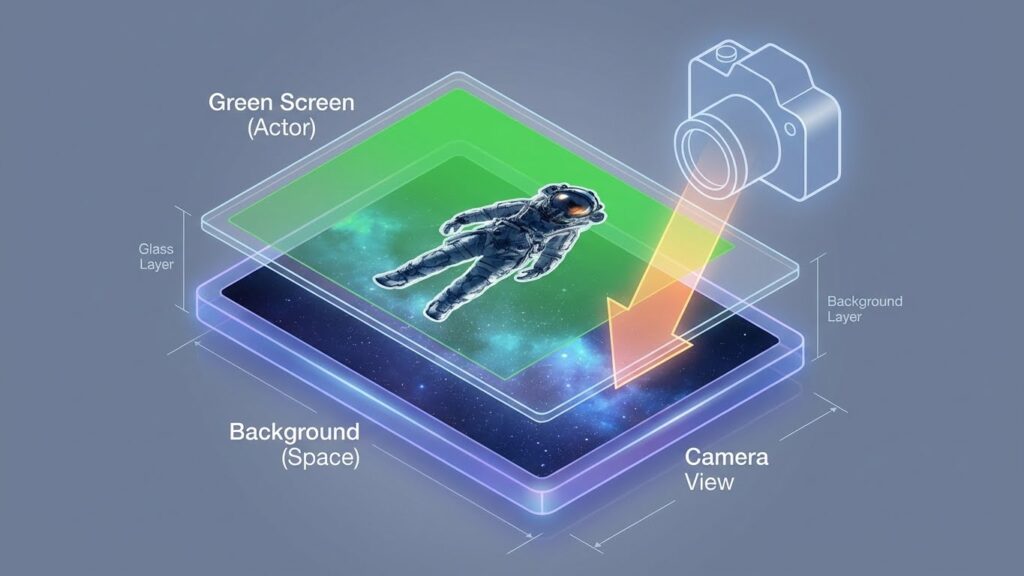
Stacking Order: Foreground vs. Background
In Alight Motion, the Top Layer covers the Bottom Layer.
- Bottom Layer (Track 1): This is your Background (e.g., the space scene, the street, or the gameplay footage).
- Top Layer (Track 2): This is your Green Screen footage (e.g., the actor or the explosion effect).
Action: Import your background video first. Then, tap (+) > Media and import your green screen clip on top of it.
Step 2: Applying the Chroma Key Effect
Now, let’s make that green disappear.
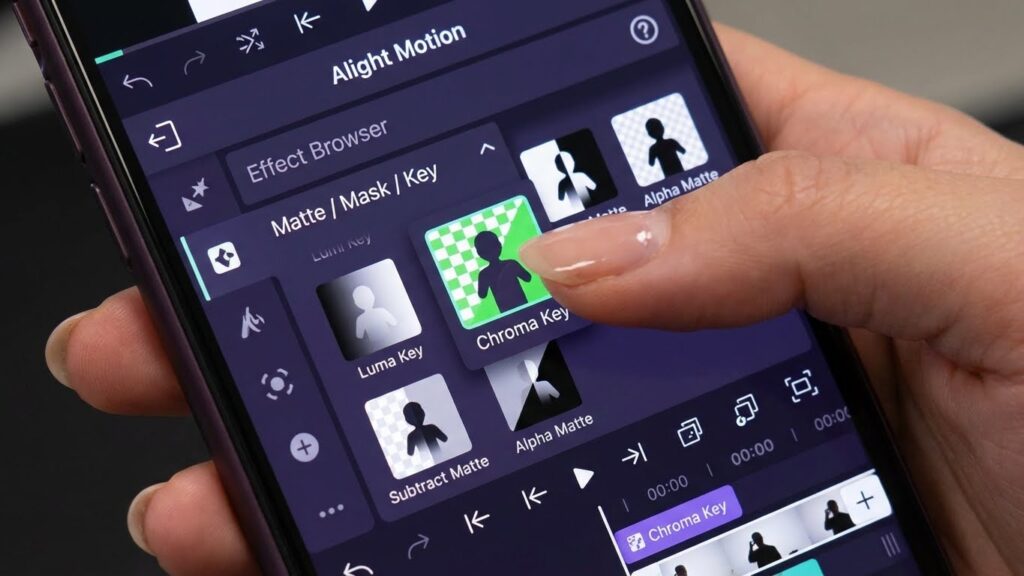
Finding the Effect (Matte/Mask/Key)
- Select your Green Screen Layer (the top one).
- Tap Effects > Add Effect.
- Scroll down to the “Matte / Mask / Key” category.
- Select Chroma Key (Standard Settings).
Selecting the Correct Key Color (Eyedropper Tip)
By default, Alight Motion selects a generic “Pure Green.” However, your video might be a slightly darker or lighter shade.
- Tap the Key Color box (usually a green square).
- Select the Eyedropper Icon.
- Drag the target over the greenest part of your video preview.
- Release to lock in that exact shade.
Step 3: Refining the Edges (The Professional Polish)
Simply applying the effect isn’t enough. You usually get “noise” or a ghosty look. You need to adjust the sliders.
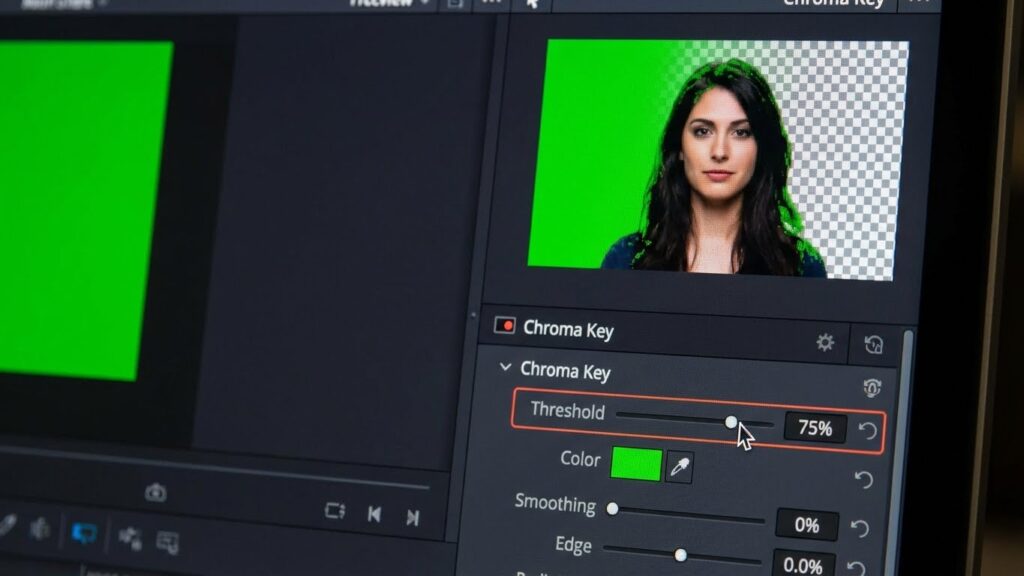
Adjusting “Threshold” (Removing the Background)
This slider tells the app how much of that color to remove.
- Action: Slowly increase the Threshold.
- Visual: Watch the green disappear. Stop exactly when the green is gone but your subject is still solid.
- Warning: If you push it too high, your subject will start to become transparent (holes in the body).
Adjusting “Feather” (Softening the Cutout)
If your cutout looks sharp and jagged (like a bad sticker), use Feather.
- Action: Increase Feather slightly (to around 50-100).
- Result: This blurs the edges of the cutout, blending your subject more naturally into the new background.
Advanced Techniques: Beyond Alight Motion Green Screen
Chroma Key isn’t the only way to remove backgrounds.
Removing Black Backgrounds (Blending Modes)
If you have an effect like “Fire” or “Rain” on a Black Background, do not use Chroma Key. It will look terrible.
- The Better Way: Use Blending Modes.
- Select the layer.
- Tap Blending & Opacity.
- Select Lighten > Screen.
- Result: All black pixels become transparent instantly. This is perfect for the overlays found in our [Presets & XML Library].
Keying Blue Skies (Sky Replacement)
Want to change a dull grey sky to a sunset?
- Method: Use Chroma Key, but select the Sky Color (Blue/Grey) as your Key Color. Place a sunset video on the bottom layer.
Troubleshooting Common Errors
“Green Halo” / Spill Suppression
Do you still see a thin green line around your subject?
- The Fix: Go back to the Chroma Key effect settings. Look for “Key Color Suppression” (or in newer versions, add the separate “Spill Remove” effect). This desaturates the edges to turn that green halo into a neutral grey/white.
Lighting Issues (Why Keying Fails)
If your green screen footage has heavy shadows or wrinkles, the app sees “Dark Green” and “Light Green” as two different colors. It can only remove one.
- The Fix: Unfortunately, you cannot fix bad lighting in post-production easily. You may need to use multiple Chroma Key effects stacked on top of each other, one for the dark green areas, one for the light green areas.
Frequently Asked Questions (FAQ)
Conclusion: Create Impossible Worlds
Mastering the Alight Motion Green Screen tools opens up infinite possibilities. You are no longer limited to the footage you can shoot; you can place your subjects anywhere in the universe.
Start by practicing with simple “Subscribe Button” overlays, then move on to complex Sky Replacements. If your video starts lagging with all these layers, remember to check our [Troubleshooting Hub] for performance tips.
Now, go clear that background!